Configuring Static IP Address Graphically:
In this section, I am going to show you how to configure static IP address on CentOS 8 from the graphical user interface.
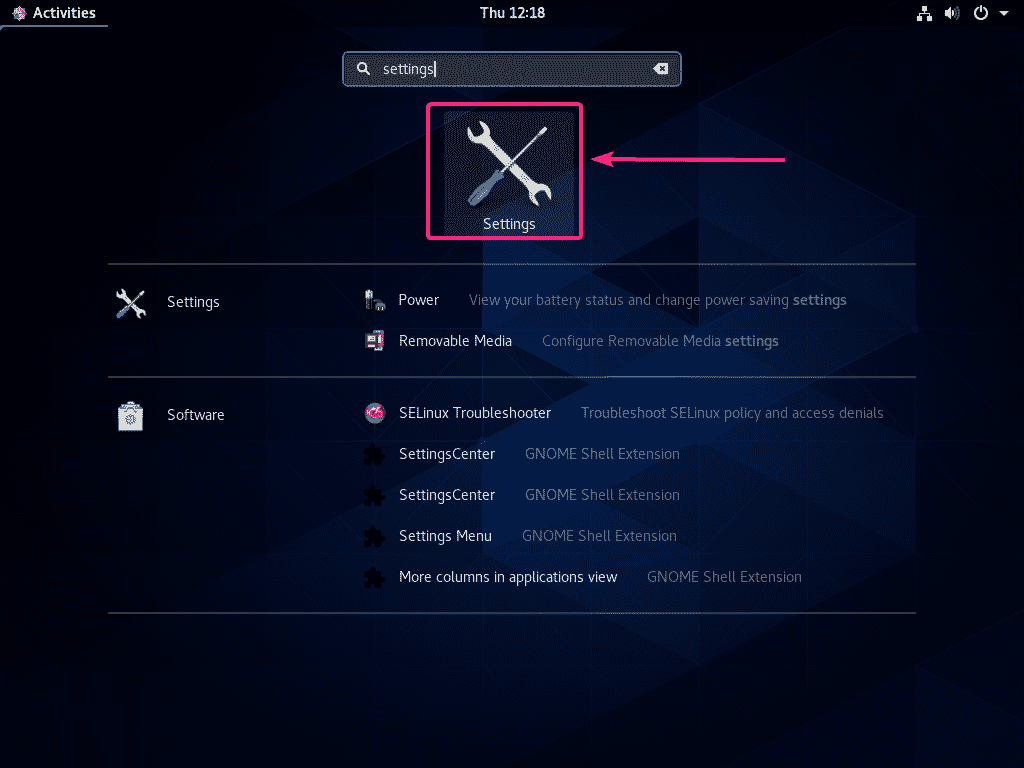
First, open the Settings app from the Application Menu of CentOS 8.
Now, go to the Network section and you should find your network interface there.
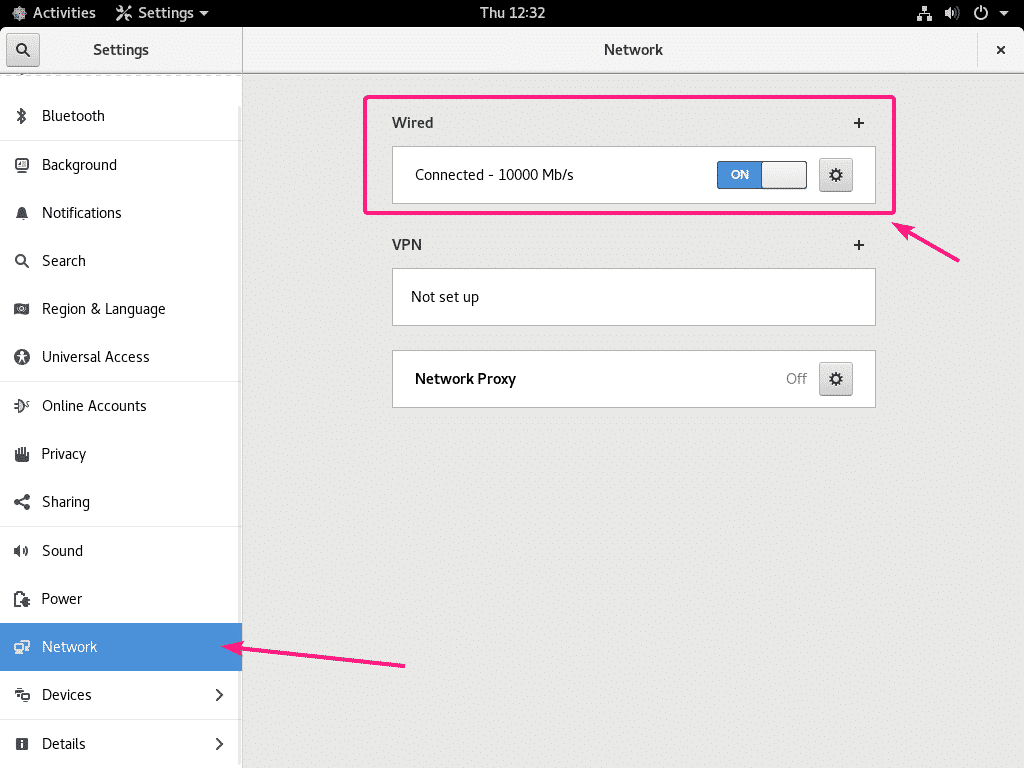
To configure the network interface, click on the gear icon of your network interface.

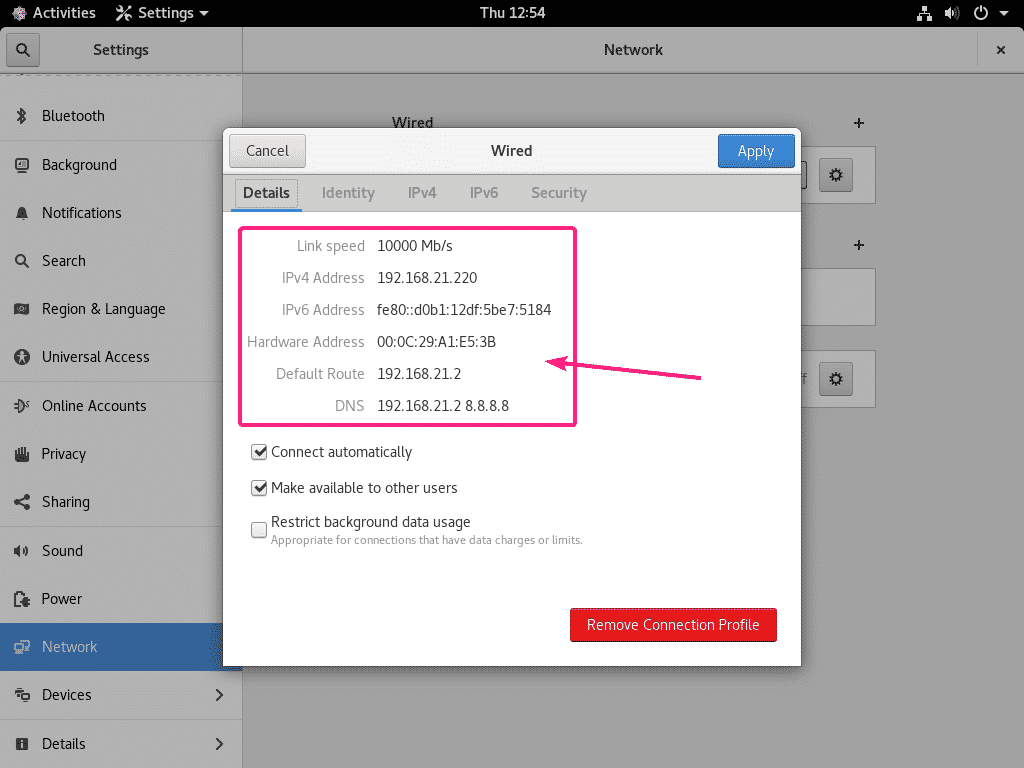
From the Details tab, you will see the current network configuration.

To configure a static IPv4 address on your network interface, go to the IPv4 tab.
To configure a static IPv6 address on your network interface, go to the IPv6 tab.
In this article, I will configure a static IPv4 address. But the processes are the same for IPv6.
By default, a network interface is configured to Automatically get an IP address, DNS and routing information via DHCP.

To set up a static IPv4 address, select Manual as the IPv4 method. An Addresses section should show up. Type in your IPv4 Address, Netmask and Gateway there.

You can configure multiple IPv4 address to the same network interface.

If you want to set up DNS server address manually, toggle OFF the marked button from the DNS section.

Now, type in your DNS server address.
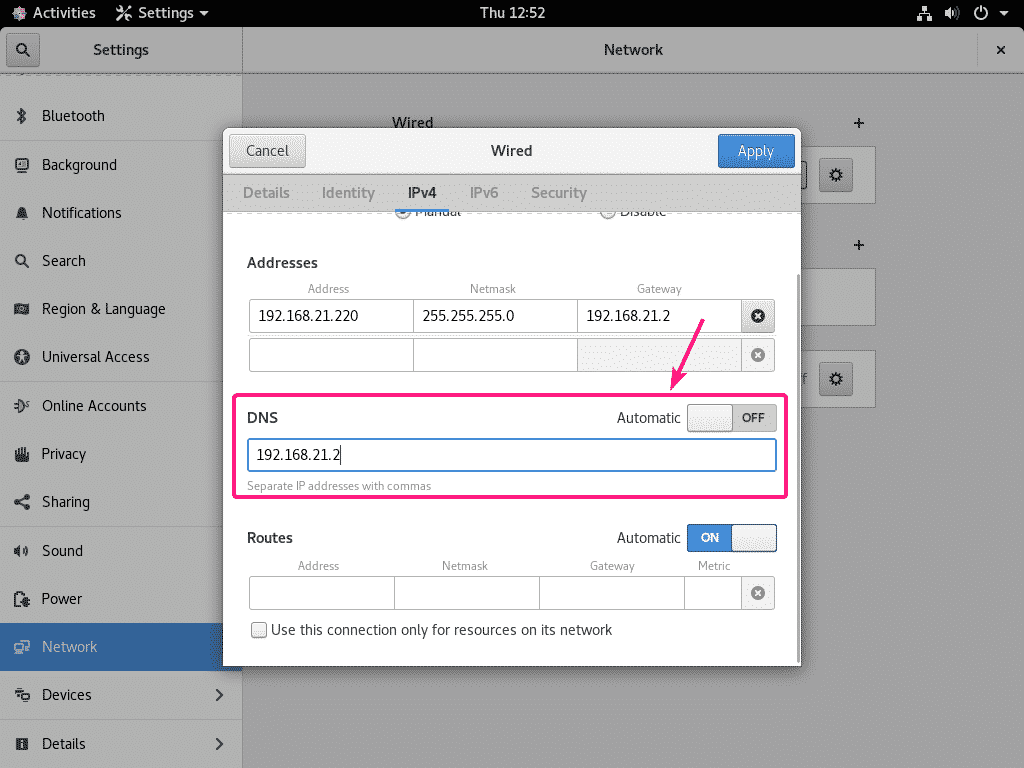
If you want, you can add multiple DNS server addresses. Just separate each addresses with a comma (,).

Now, click on Apply to save the changes.

Now, click on the toggle button (toggle OFF) of your network interface.

Now, click on toggle button (toggle ON) again of your network interface.

The new configuration should be active. Now, click on the gear icon to verify the network configuration.

Your desired IPv4 address should be successfully configured to your desired network interface.
Configuring Static IP from the Command Line:
In this section, I am going to show you how to configure a static IP address on your CentOS 8 machine from the command line.
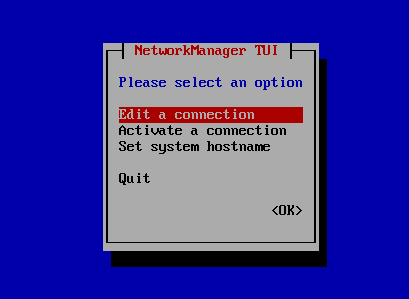
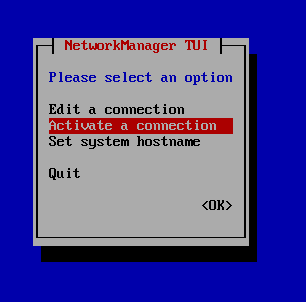
You can use nmtui (Network Manager Text User Interface) command to configure the network interface on your CentOS 8 machine.
To start nmtui, run the following command:

Now, select Edit a connection and press <Enter>.
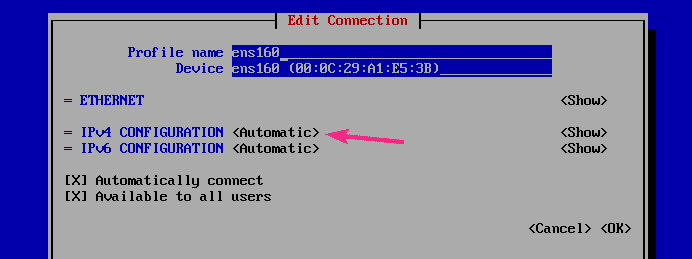
Now, select your network interface, select <Edit…> and press <Enter>.

If you want to configure IPv4 static IP address, then go to IPv4 CONFIGURATION <Automatic> and press <Enter>.
If you want to configure IPv6 static IP address, then go to IPv6 CONFIGURATION <Automatic> and press <Enter>.
In this article, I am going to configure a static IPv4 address.
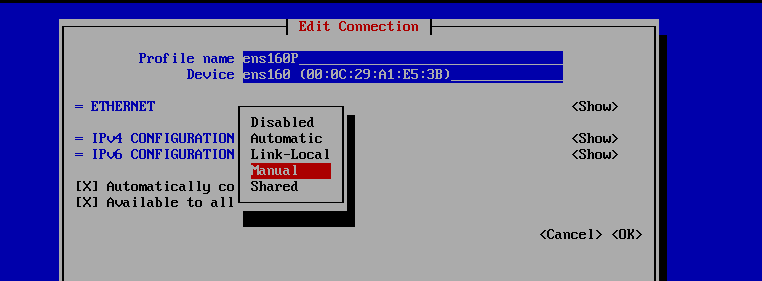
Now, select Manual and press <Enter>.
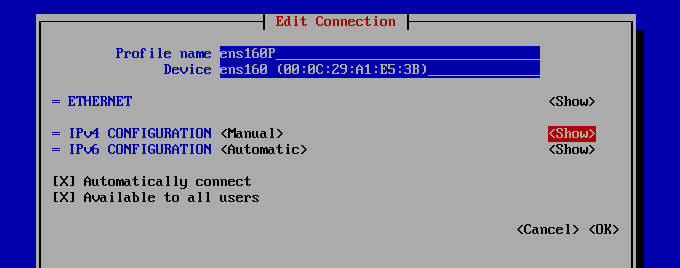
Now, select <Show> and press <Enter>.
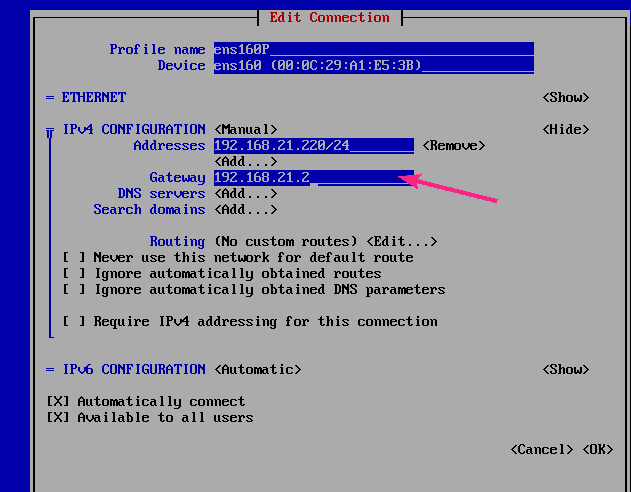
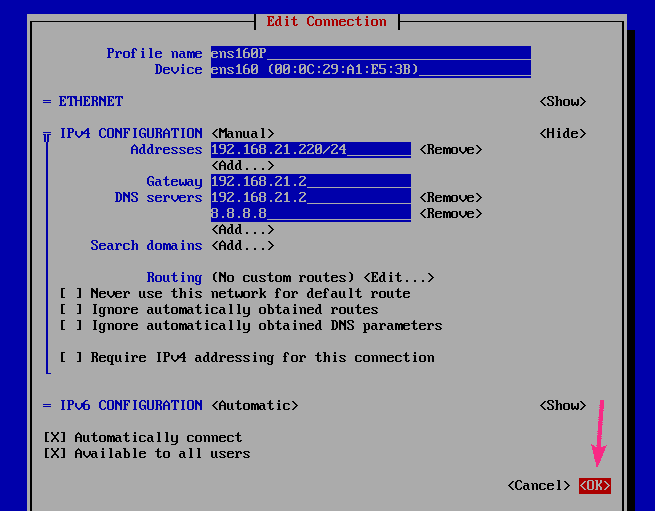
Now, you have to set your IP address, gateway, DNS server address here.

Go to Addresses <Add…> and press <Enter>.

Now, type in your desired IP address.
Here, the IP address must be in CIDR notation IP_ADDRESS/MASK_LENGTH. The most common MASK_LENGTH is 24, which is equivalent to subnet mask 255.255.255.0.
You can use the Online IP CIDR/VLSM Calculator if you’re having difficulty figuring out the MASK_LENGTH.
You can add multiple IP addresses if you want.

Now, go to the Gateway section and type in your gateway address.
If you want to add DNS server addresses, go to the DNS servers <Add…> section and press <Enter>.
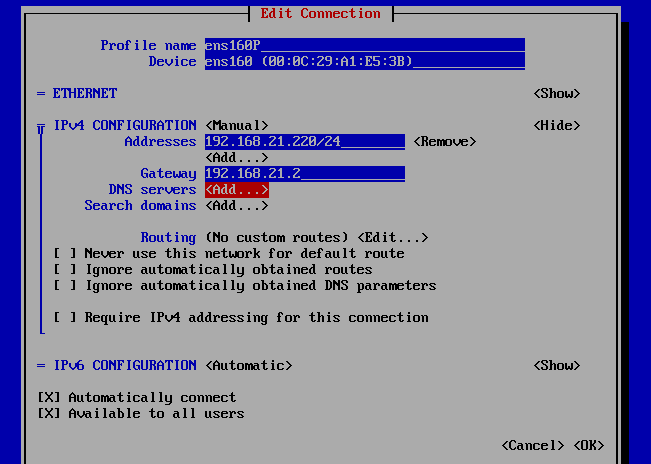
Now, type in your DNS server address.

You can add multiple DNS server addresses if you want. To do that, select <Add…> from the DNS servers section and press <Enter>.
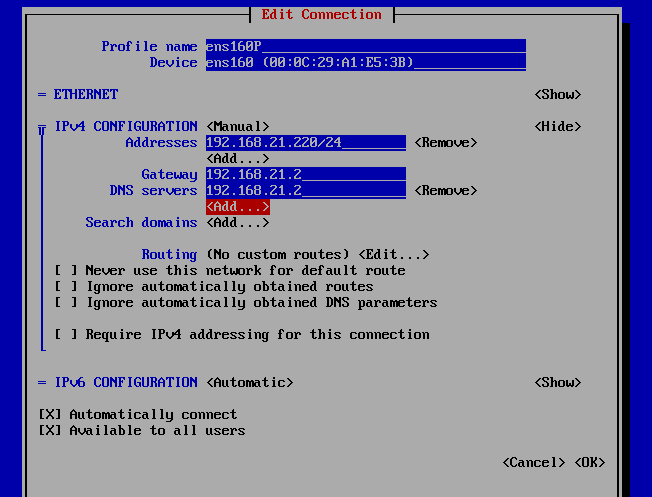
Now, type in another DNS server address.
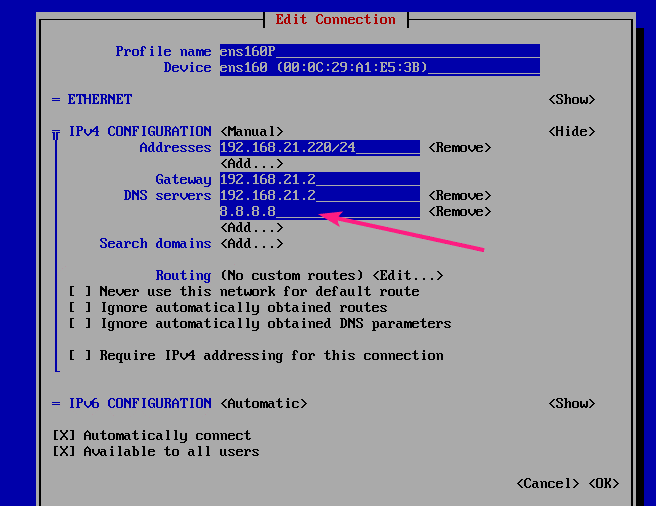
Once you’re done, select <OK> and press <Enter>.
Now, press <Esc>.

Now, select Activate a connection and press <Enter>.

Now, select the network interface that you’ve just configured, select <Deactivate> and press <Enter>.

Now, select <Activate> and press <Enter>.

Now, press <Esc>.

Press <Esc> again.
Now, run the following command to verify whether the IP address is configured correctly.
As you can see, the IP address is configured correctly.

So, that’s how you configure static IP address on CentOS 8. Thanks for reading this article.