In this article, I am going to show you how to upgrade your existing RHEL 7 system to RHEL 8. So, let’s get started.
Requirements:
In order to do an in place upgrade on your RHEL 7 system, you must meet the following requirements:
- You must start the upgrade from RHEL 7.6. If you have an older version of RHEL 7 installed, then you must upgrade it to RHEL 7.6 first. Then, you can upgrade to RHEL 8.
- You can only upgrade RHEL 7 server version.
- You must be using RHEL 7 64-bit version.
- You must have at least 100 MB of free space available for /boot if you have /boot directory as a separate partition.
- You must have FIPS disabled on your RHEL 7 if you’ve enabled it. By default, it is not enabled.
NOTE: Before you attempt to upgrade your operating system from RHEL 7 to RHEL 8, it’s always a good idea to backup all your important data from the server. Anything can go wrong and you may end up losing your precious data. You should not take any risks.
Upgrading to RHEL 7.6:
First, make sure that the Red Hat Enterprise Linux Server subscription is attached with the following command:
![]()
As you can see, the Red Hat Enterprise Linux Server subscription is attached.

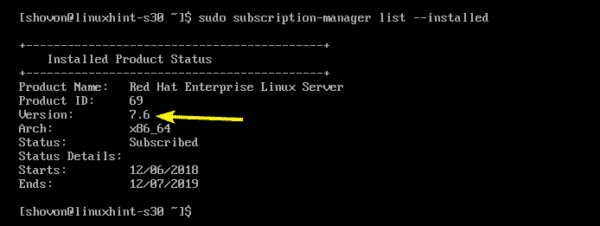
You can list the subscription you have with the following command:
As you can see, the attached subscription in my RHEL 7 server is listed. So, I can upgrade to RHEL 7.6

Now, set the release to RHEL 7.6 with the following command:

Before you start upgrading, you may check the current version of RHEL 7 you’re using as follows:
As you can see, I am running RHEL 7.3 at the moment.

Now, to upgrade to RHEL 7.6, run the following command:
![]()
As you can see, 275 packages (about 317 MB) will be updated. To confirm, press y and then press <Enter>.

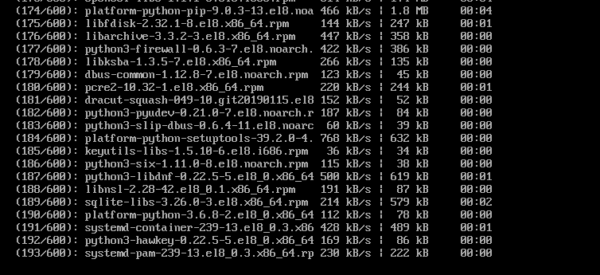
RHEL 7 will start downloading and install updates. It may take a while to complete.

All the updates should be installed.

Now, reboot your server with the following command:
![]()
As you can see, RHEL 7 is updated to version 7.6.

Installing and Configuring leapp:
Now, you have to install leapp. leapp is used to upgrade RHEL 7.6 to RHEL 8.
First, enable the RHEL 7 Extras repository with the following command:
![]()
RHEL 7 Extras repository should be enabled.

Now, install leapp with the following command:

Now, press y and then press <Enter> to continue.

leapp should be installed.

Now, download the leapp data archive file with the following command:
NOTE: wget may not be installed on your RHEL 7 server. But, you can easily install it with sudo yum install -y wget

Now, extract the leapp data archive to the /etc/leapp/files directory with the following command:
![]()
Now, you may remove the leapp archive for cleanup purpose with the following command:
![]()
Now, you can start the upgrade process.
Upgrading to RHEL 8:
Now, to upgrade to RHEL 8, run the following command:
![]()
leapp will check whether the RHEL 7 system you have is upgradable to RHEL 8. If it is, then, it will start the upgrade process. Otherwise, it will log the problems it detected in the /var/log/leapp/leapp-report.txt file. You can check that file and fix any problem reported there. Once the problem is fixed, you can try to upgrade again.
As you can see, leapp is upgrading my RHEL 7 system to RHEL 8. It will take a while to complete.

The required packages are installed and upgraded.

Now, to finish the upgrade process, reboot your server with the following command:
![]()
While the system is being updated, it may reboot a few times on its own.
Once the update is completed, you should see Red Hat Enterprise Linux 8.0 (Ootpa) on your login screen. As you can see, the kernel is also updated to version 4.18.

You can further verify that the upgrade was indeed successful with the following command:

So, that’s how you upgrade from RHEL 7 to RHEL 8. Thanks for reading this article.


