Installing PostgreSQL Database:
PostgreSQL is available in the official package repository of CentOS 8. So, you can easily install it using DNF or YUM package manager.
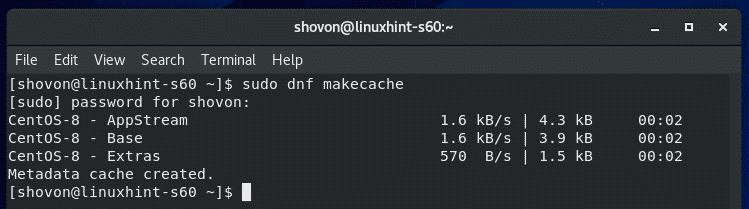
First, update the CentOS 8 package repository cache with the following command:

The CentOS 8 package repository cache should be updated.
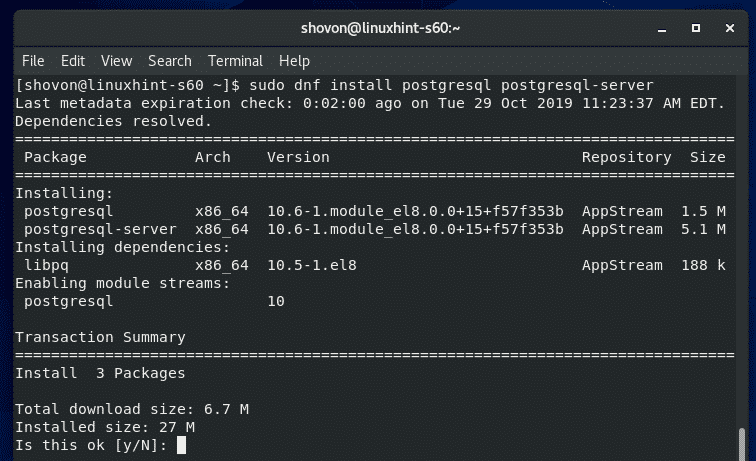
Now, install PostgreSQL database server with the following command:

To confirm the installation, press Y and then press <Enter>.
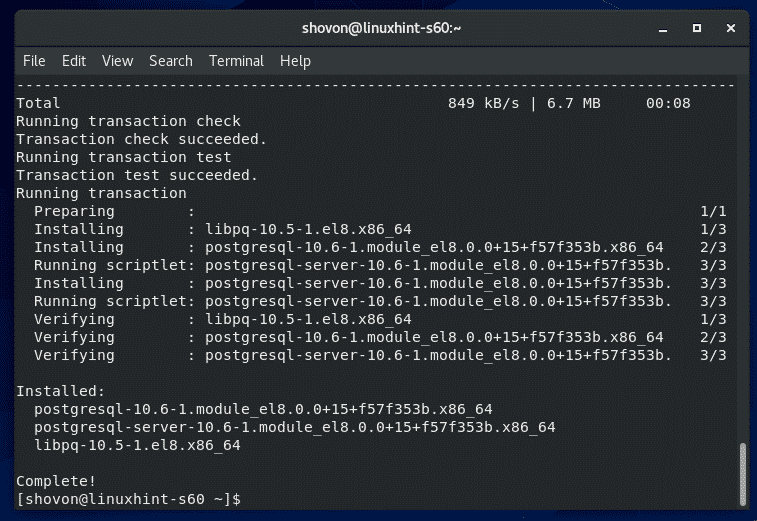
PostgreSQL database server should be installed.
Once PostgreSQL database server is installed, run the following command to verify whether the PostgreSQL database server is working.

Initializing PostgreSQL Database Server:
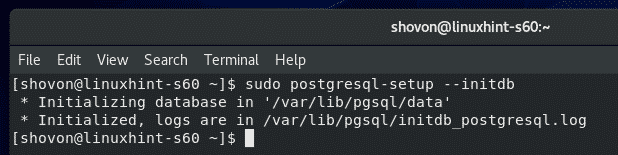
Once PostgreSQL database server is installed, you must initialize the PostgreSQL database directory.
You can initialize the PostgreSQL database directory with the following command:

PostgreSQL database directory should be initialized.
Managing PostgreSQL Database Service:
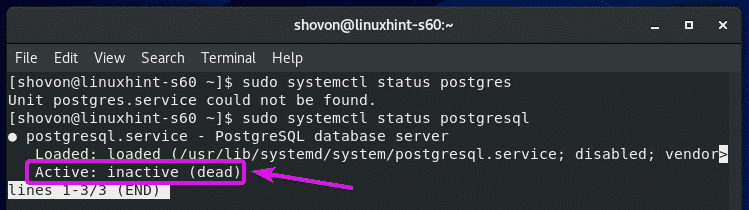
PostgreSQL database service will not be running by default as you can see in the screenshot below.
Once the PostgreSQL database directory is initialized, you have to start the PostgreSQL service manually as follows:

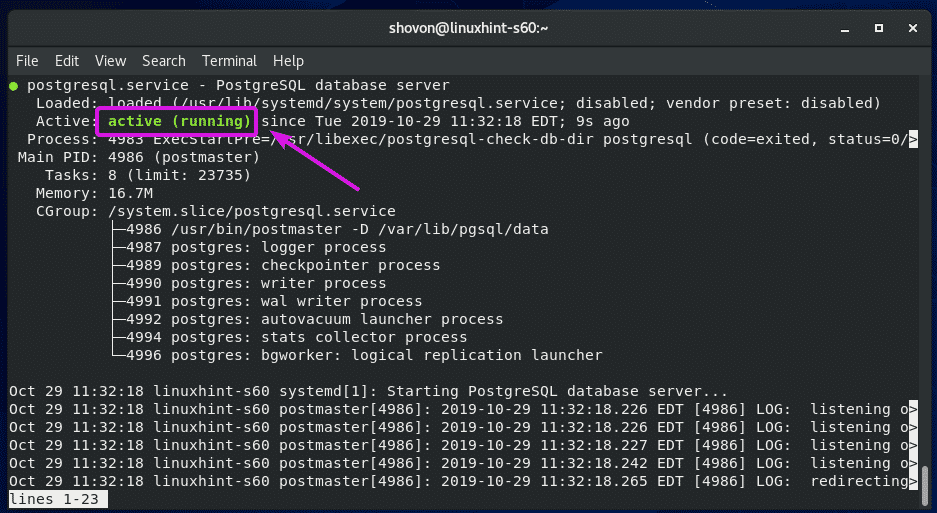
Once you start PostgreSQL database service, you can verify whether it’s running as follows:
As you can see, the PostgreSQL database service is running.
If you need to stop the PostgreSQL database service for some reason, run the following command:
If you need to restart the PostgreSQL database service for some reason, run the following command:
Starting PostgreSQL Server on System Startup:
If you don’t want to start PostgreSQL database server manually every time you boot your CentOS 8 machine, you must add it to the system startup of CentOS 8.
To add PostgreSQL database server to the system startup, run the following command:

PostgreSQL database server should be added to the system startup.

You can also remove PostgreSQL database server from the system startup as follows:
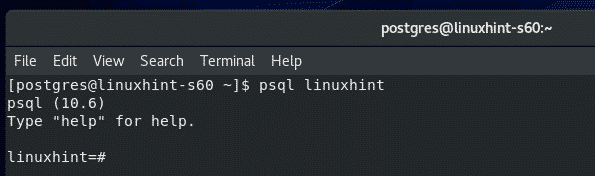
Login in as posgres User:
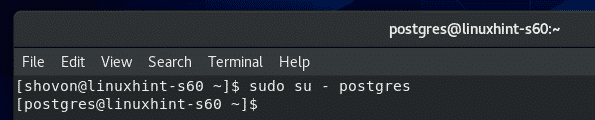
In order to run any PostgreSQL database service, you will have to login as the postgres user.
You can login as the postgres user as follows:
Creating a PostgreSQL Database:
You can create a PostgreSQL database (let’s call it linuxhint) with the following command:

Now, you can use the linuxhint database as follows:
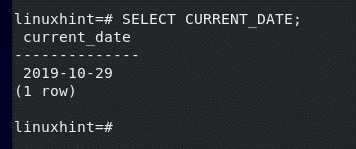
Let’s run a SQL query and test whether it works or not.
It works.
Once you’re done using the database, exit out of the database as follows:

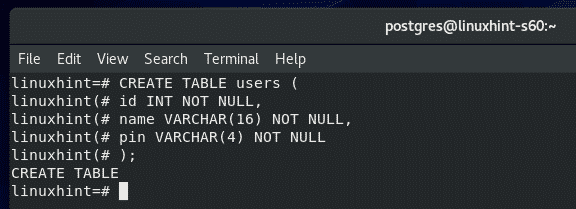
Creating PostgreSQL Database:
Now, let’s create a new table users in our linuxhint database.
Here is the SQL statement to create the table users. Copy and paste the SQL statements in the PostgreSQL shell to create a new table users.
id INT NOT NULL,
name VARCHAR(16) NOT NULL,
pin VARCHAR(4) NOT NULL
);
The users table should be created.
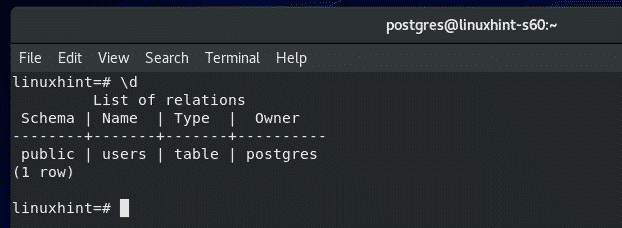
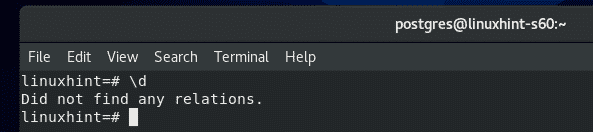
You can list all the available tables in your database as follows:
As you can see, the users table is in the list.
You can also see the schema of the users table as follows.

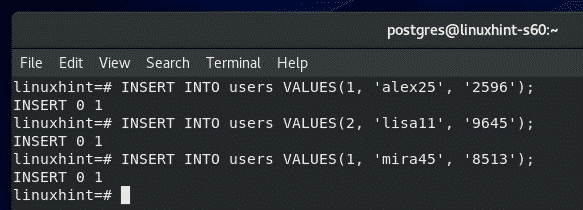
Inserting Data into Tables:
Now, let’s insert some new rows into the users table.
To insert new rows into the users table, you can run the following INSERT SQL statements.
INSERT INTO users VALUES(2, ‘lisa11’, ‘9645’);
INSERT INTO users VALUES(1, ‘mira45’, ‘8513’);
I’ve inserted 3 new rows into the users table.
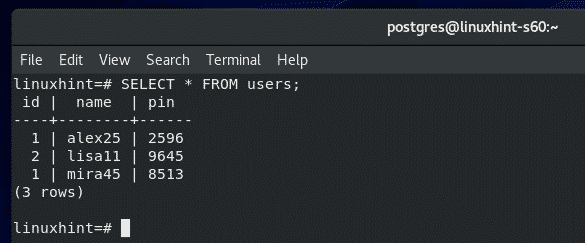
Reading Data from Tables:
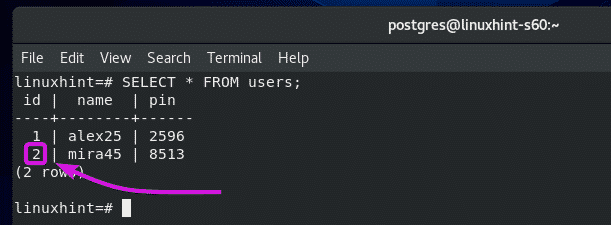
Now, to select all the rows from the users table and print them on the console, run the following SQL statement.
As you can see, the data I’ve inserted earlier is printed on the console in tabular format.
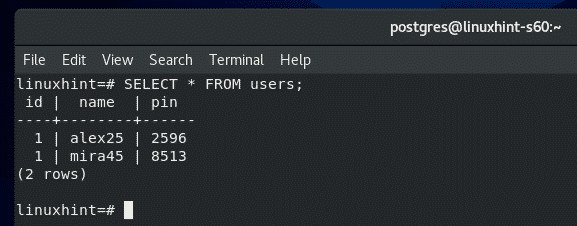
Removing Data from Tables:
To delete a row from the users table with the name ‘lisa11’ (let’s say), run the following SQL statement:

As you can see, that row is not in the users table anymore.
Updating Data from Tables:
Let’s say, you want to update the id of ‘mira45’ of the users table from 1 to 2.
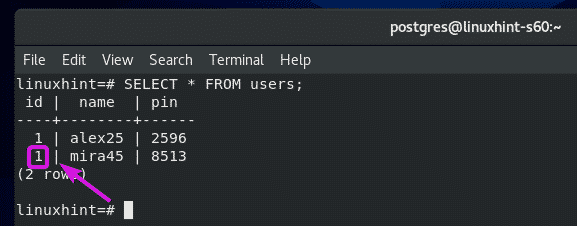
To do that, run the following SQL statement:
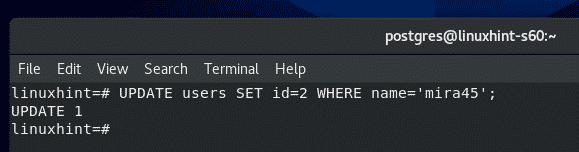
As you can see, the id of ‘mira45’ is updated from 1 to 2.
Removing Tables:
To remove the table users, run the following SQL statement:
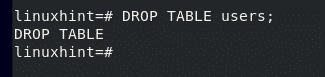
The table should be removed.
Deleting Databases:
To delete the database linuxhint, run the following command as postgres user.

The database linuxhint should be removed.
So, this is how you install PostgreSQL and do basic PostgreSQL CRUD operations on CentOS 8. Thanks for reading this article.