VirtualBox: Beginners Guide and How to Setup Ubuntu Virtual Machine

What is VirtualBox?
VirtualBox (VB) is a cross-platform hypervisor or virtualization software developed by Oracle Corporation. Basically VB allows user to run guest operating system on another host operating system virtually without need for partitioning of hard drive or running another OS on dual boot which involves risk of crashing the host system.
What VirtualBox actually does is that it creates virtual hard drive and installs guest OS on it. Virtual hard drive is nothing but a big size file stored on the computer hard drive. This file works as a real hard drive for the guest OS.
Running any application software or video game on virtual machines is sometimes not as smooth as running them on an OS installed on full hardware. Everything depends on amount of hardware resource allocated to virtual machine.
Why to use VB?
I know many of us have heard of VirtualBox but always been shy of trying or using it just because we think it is a messy task to setup a Virtual Machine and it might harm our whole computer system. But it is the misconception because setting up virtual machines is an easy task and it won’t affect your computer system if you set it up correctly. We will find how to do that in later part of the article.
- VirtualBox can be very useful for people like me who always like to try and mess with different application software’s and operating systems.
- It can also be a very useful tool for application developers who can test their application on different platforms before releasing it for general public.
- Software reviewers like me can also use this to try and test software’s on different platforms under one single window.
Installation
First of all head over to downloads page on VirtualBox’s official website and download the installation package depending on your operating system. As I am going to install VB on Windows I will select Windows.

Once the downloading is complete run the installation file and follow the steps as the installer guides you through installation process.

You don’t need to change anything during installation so just click Next every time it asks for and finish the installation.
Once the installation is complete start the VirtualBox from the desktop or Start Menu and you will see home screen will appear as shown below.

Setting Up VirtualBox for Ubuntu Installation
Now we will see how to setup Virtual Machine for installing Ubuntu on VirtualBox. You can follow these steps to install Windows 10, Mac OS and others too.
Create Virtual Machine
To start, click on the New button on the top of VirtualBox’s home screen. Then Create Virtual Machine window will appear where you will have to give Virtual Machine a name like I have given it Ubuntu 18.04, then select type and version of operating system you are going to install.
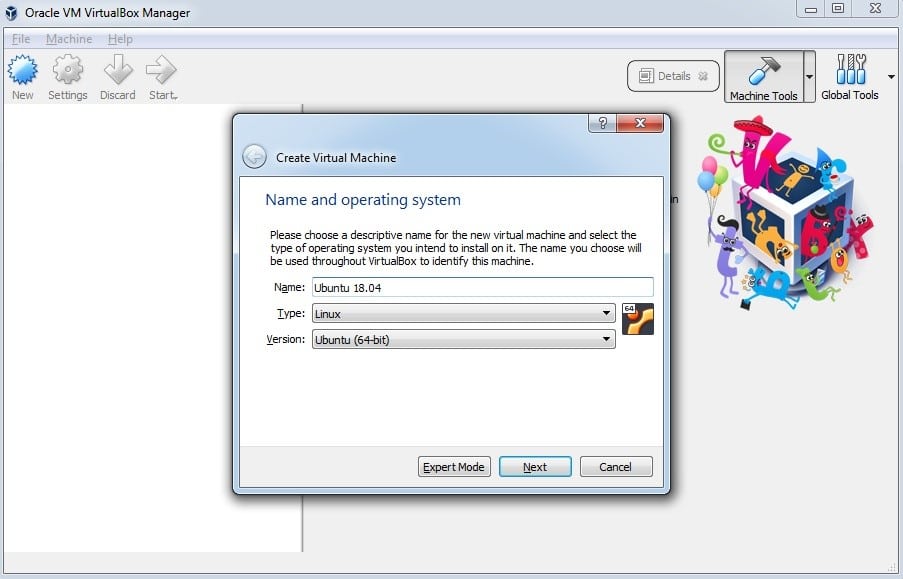
I am going to install Ubuntu 18.04 LTS (Long Term Support) edition is which is 64-bit operating system.
RAM Allocation
Click Next, then you will be asked for RAM allocation. Always remember new allocate more than half of your total RAM memory else it will affect your computers performance and in some cases it might crash host system.

I have total 4GB of RAM, so I will allocate 2GB i.e. 2048MB which should be enough to run Ubuntu. Again click Next, then it will ask you to create Virtual Hard Disk.
Set Up Virtual Hard Disk
Now you will need to create Virtual Hard Disk to store VM data. Just select Create a virtual hard disk now option and click on Create button.

On the next screen you will be asked whether to create a dynamically allocated or fixed size hard disk. If you want VM to always perform smoothly then you should select fixed size where you will have to set size of the hard disk but it will consume more disk space for better performance.

With dynamically allocated disk, you’ll have to set maximum disk size but file will not consume more than allocated disk space. If you want VM with high performance then you are recommended to select Fixed size and then click Next.
Then you will need to select the size of virtual hard disk. Selecting disk size always depends on how you are going to use VM. If you are going to install lot of applications on Ubuntu for various purposes then you will need to allocate at least 25GB of disk space else you can allocate less space too.

Then finally click on Create and you are ready to install Ubuntu on Virtual Machine.
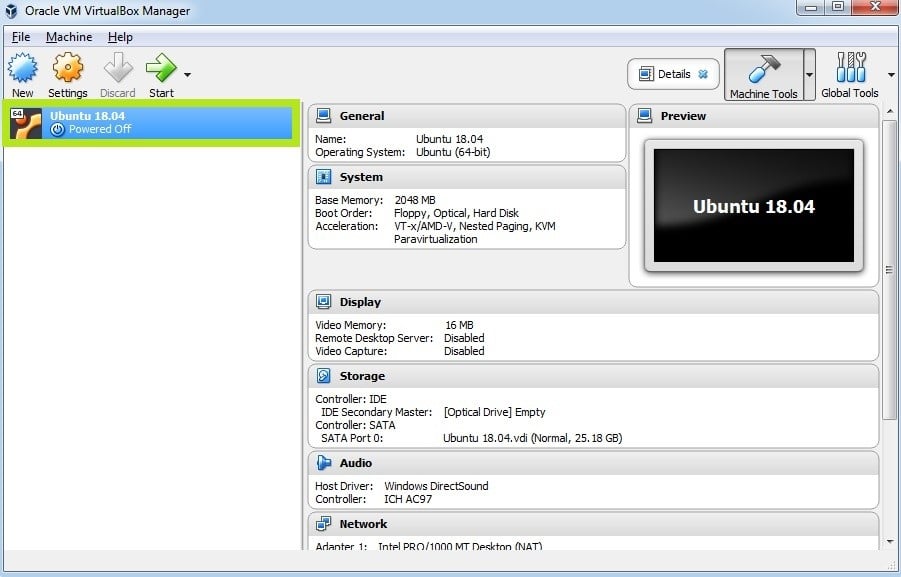
As shown in above screenshot you can see Ubuntu VM is added on VirtualBox.
Before we start Ubuntu installation we need to tweak some settings to ensure Ubuntu VM performs at its best.
Click on Settings button then following window will appear. Head over to Processor tab under System menu. Here increase Processors value to 2 and click OK.

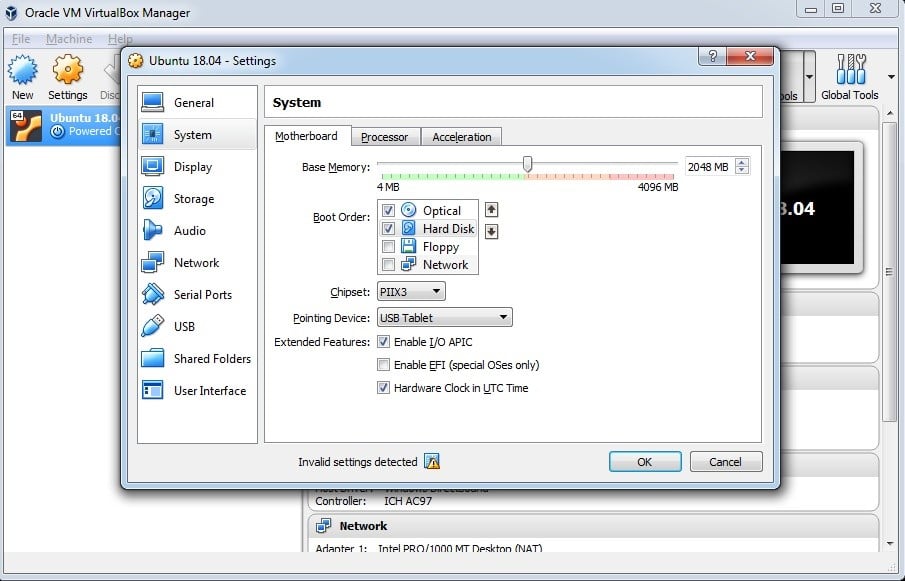
Now select Motherboard tab where under Boot Order you will notice Floppy set on highest priority. Now unselect Floppy and move Optical to top using Arrow button. Set the priority for Optical and Hard Disk as shown in below screenshot.
Then select Display menu, here under Screen tab you will have to allocate full Video Memory i.e. 128MB. Also mark the checkbox next to Enable 3D Acceleration and Enable 2D Video Acceleration.

Now we will mount .iso file for Ubuntu installation. To do that, go to Storage menu where you will notice Empty disk under Controller: IDE, select Empty.
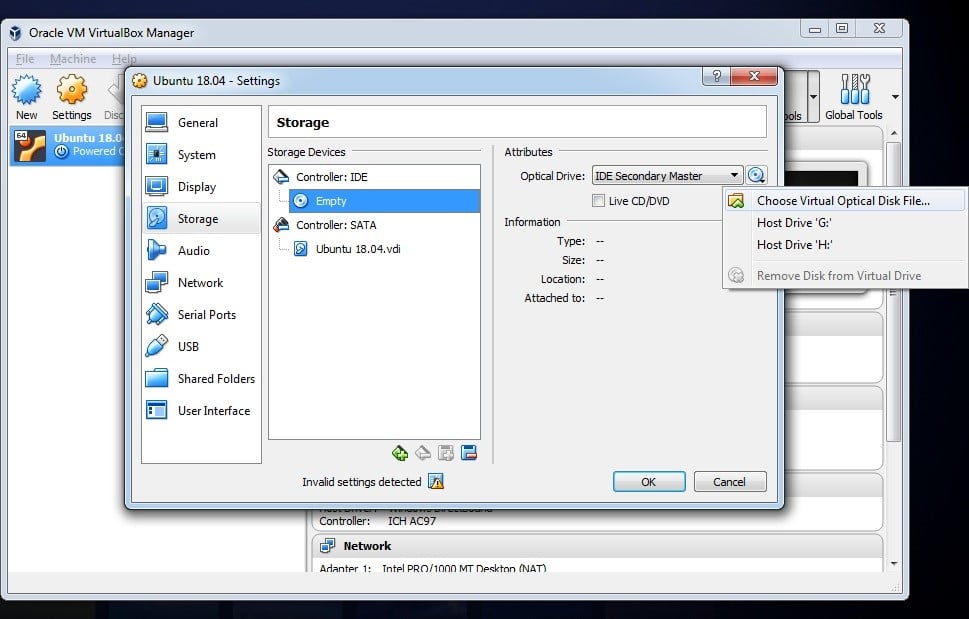
Besides that from the Optical Drive drop down click on Choose Virtual Optical Disk File and find your Ubuntu installation file.
You can download Ubuntu installation .iso file from here.
Now you can see VBoxGuestAdditions.iso disk is created in place of Empty disk. Finally click OK and you are good to go with Ubuntu installation.

Now we will start with Ubuntu installation. This process is not any different to normal OS installation we do using installation media or bootable pen drive.
To start, click on the Start button on VirtualBox home screen. This will initiate the first boot of Ubuntu.
Next you will be asked to Try Ubuntu or Install Ubuntu. You just need to click on Install Ubuntu.

On next screen you need to select your preferred language and head over to next screen which is Updates and Other Software, just select Normal Installation and click on Continue button.
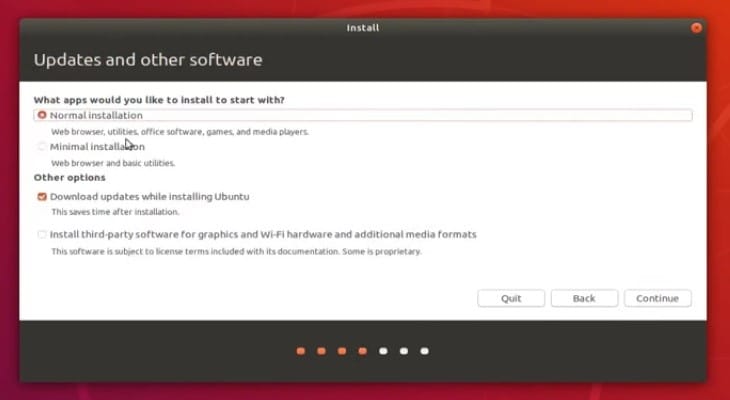
Next select your time zone and on the next screen you will be asked to provide user details. Insert the details and click on Continue.

Now Ubuntu installation will start, wait for installation to complete.

Once the installation is complete you will be asked to restart the computer. Just click on the Restart Now button and VB will do the rest.
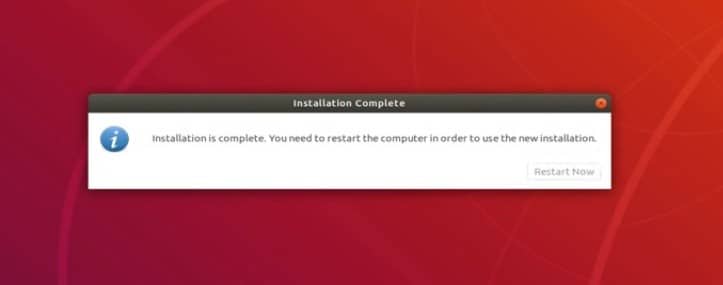
That’s it Ubuntu is installed successfully on Virtual Machine.

Install Guest Additions
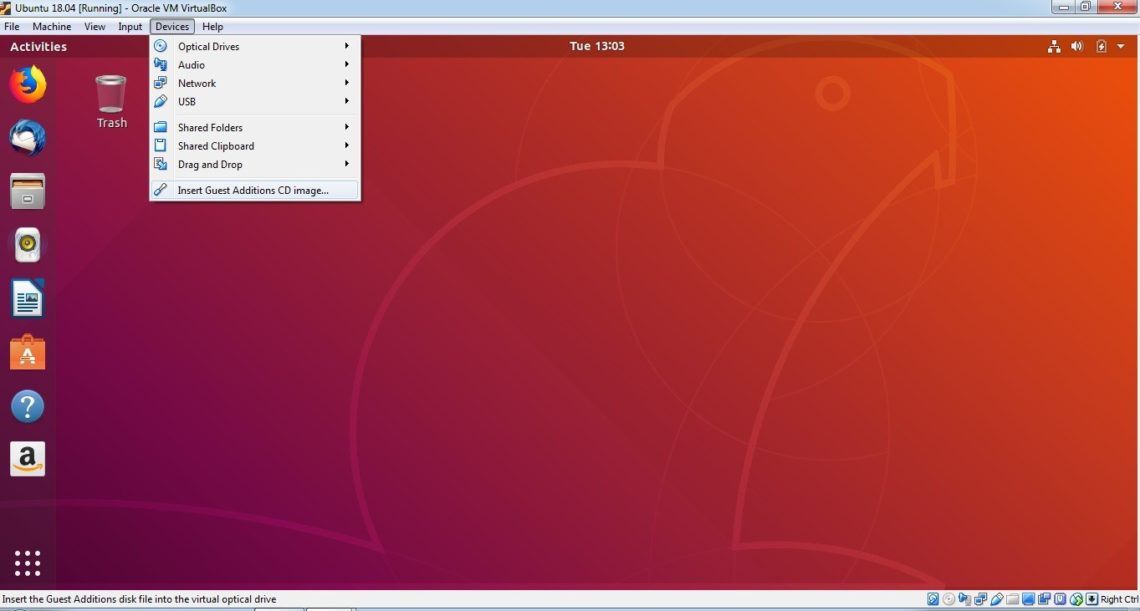
To enable all the features of VirtualBox you need to install the Guest Additions in Ubuntu. Select Devices tab from VirtualBox’s window and click on Insert Guest Additions CD image.
Prompt will appear on Ubuntu screen asking you Would you like to run it?
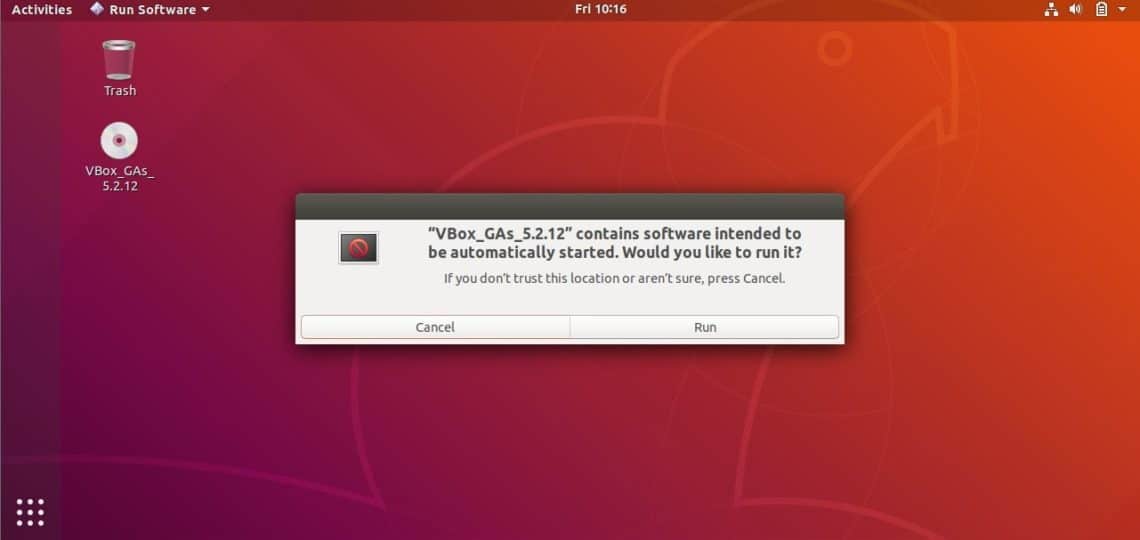
Click Run and enter password to Authenticate. Then Terminal window will open up and it will perform some installation automatically.
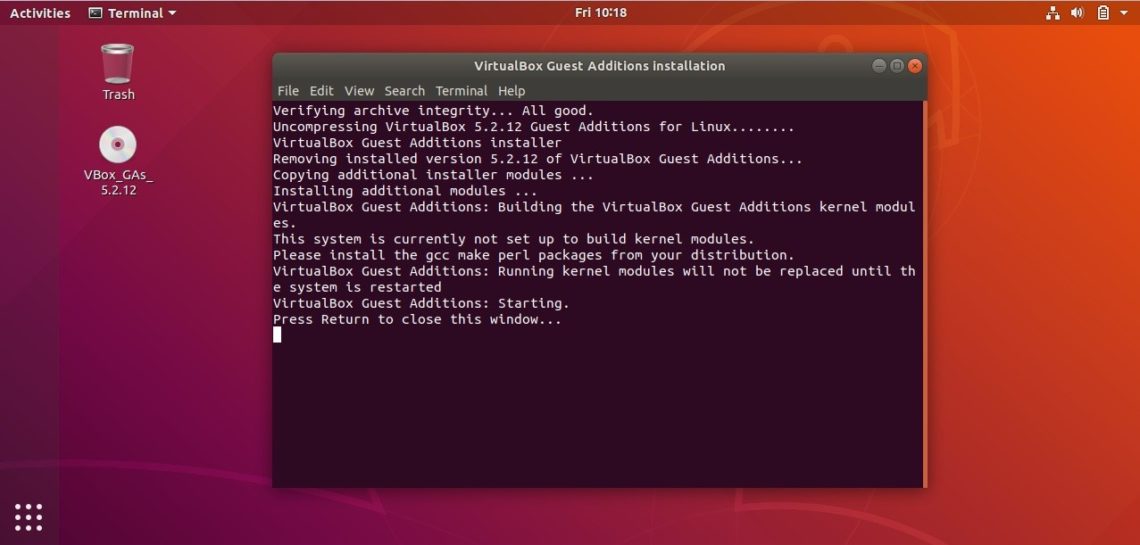
When you will see Press Return to close this window… press Enter to finish the setup.
That’s it, you are done with all the setup and now you can enjoy Ubuntu inside your Windows.
Thank you for going through our guide to setup VirtualBox. You can always share your views @LinuxHint.


