Adding a Share to the VMware VM:
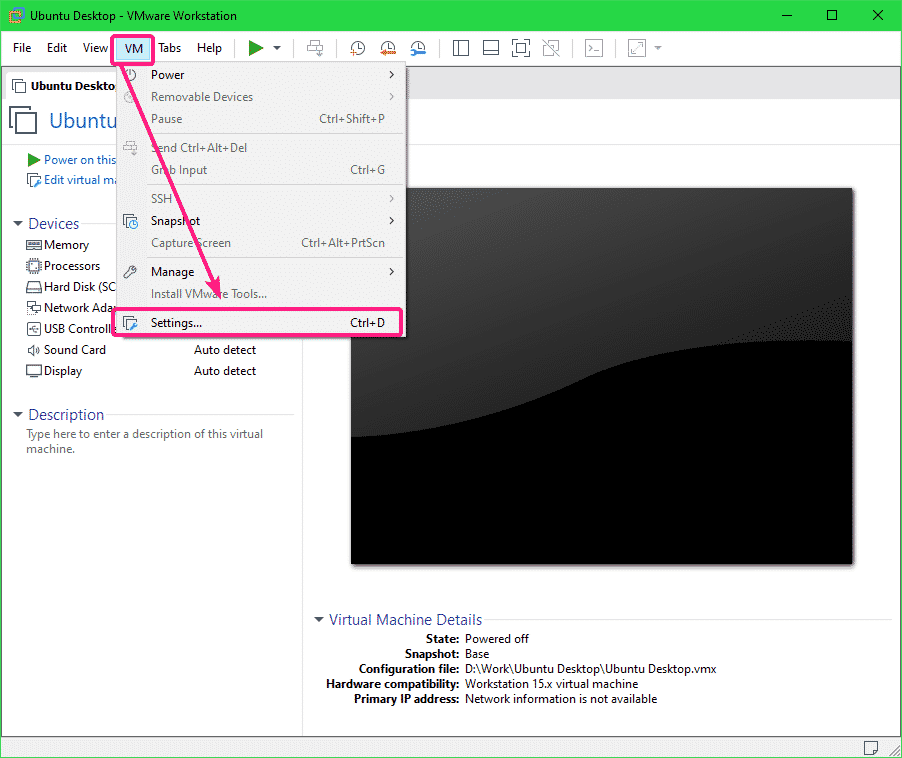
To share a directory/folder from the host to a VMware VM, open the VM, make sure the VM is not powered on and go to VM > Settings.
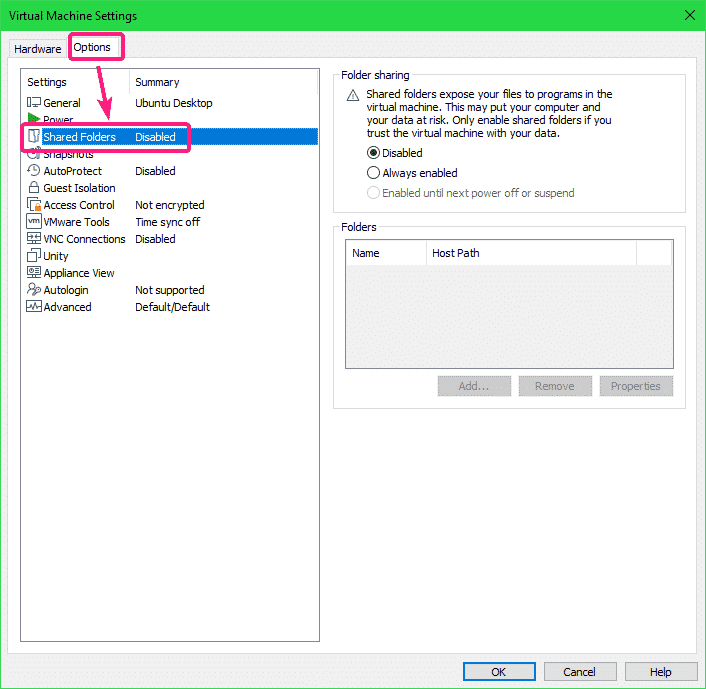
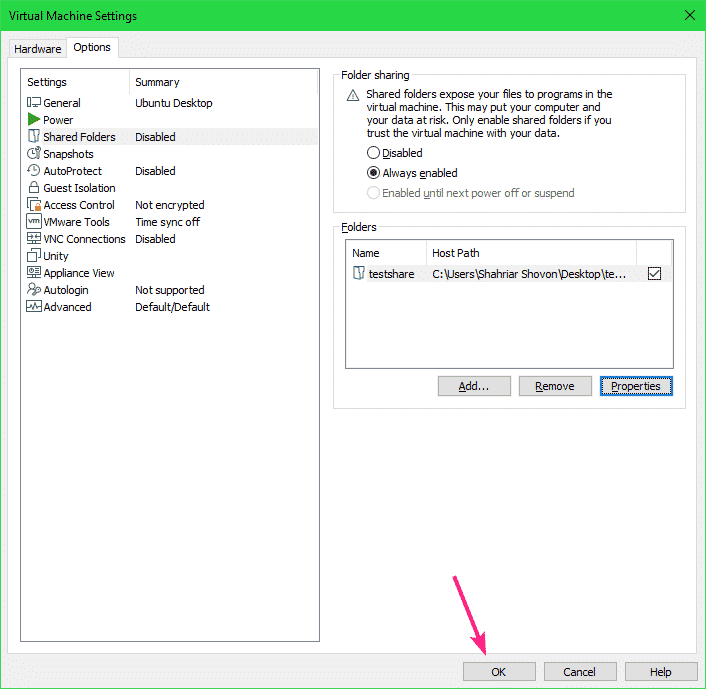
Then, go to the Options tab and click on Shared Folders.
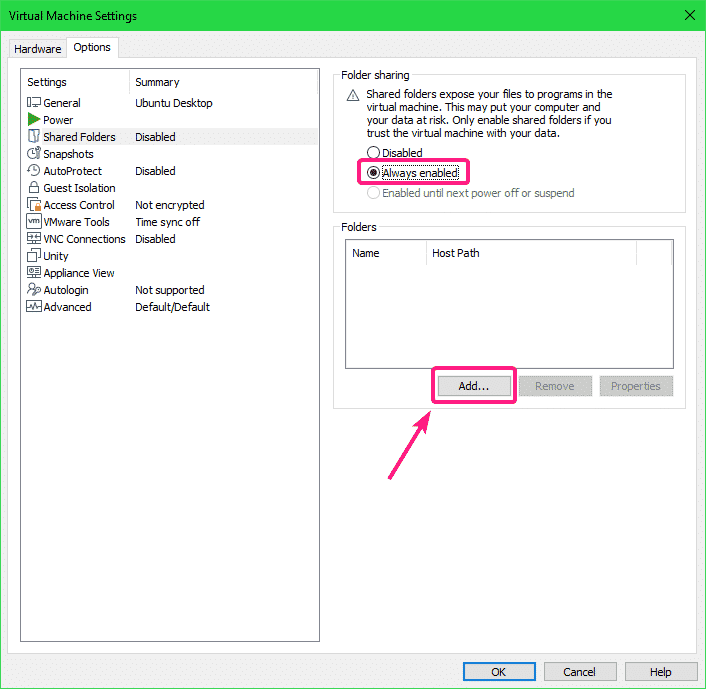
By default, Shared Folders is Disabled. To enable Shared Folders, select Always enabled.
Now, you can add shared folders. To add a shared folder, click on Add…
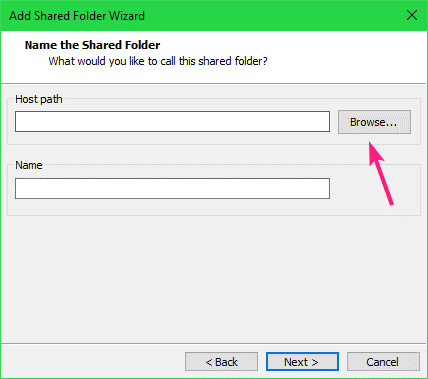
Now, click on Next.
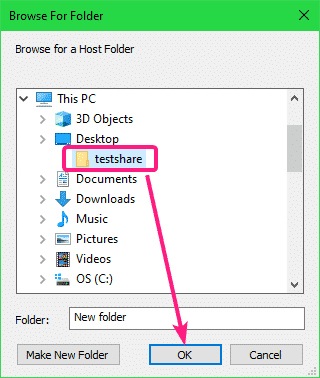
Now, click on Browse to select a directory/folder from your host computer.
Select a directory/folder that you want to share to the VMware VM and click on OK.
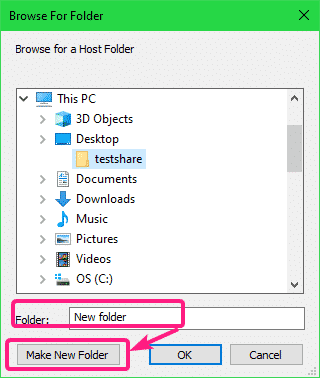
If you want to create a new directory, select a directory (parent) where you want to create a new directory, type in a Folder name and click on Make New Folder. Once the directory/folder is created, you should be able to select it for sharing.
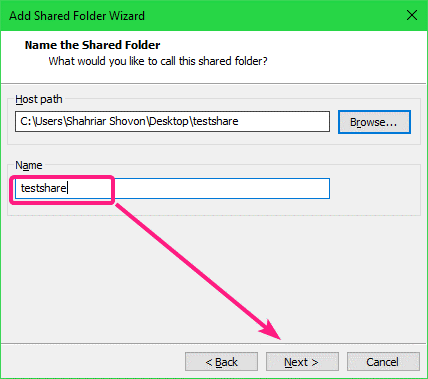
By default, the Name of the shared folder should be the name of the directory you’ve selected. If you want, you can change it. I recommend you not to add spaces in the share Name.
Once you’re done, click on Next.
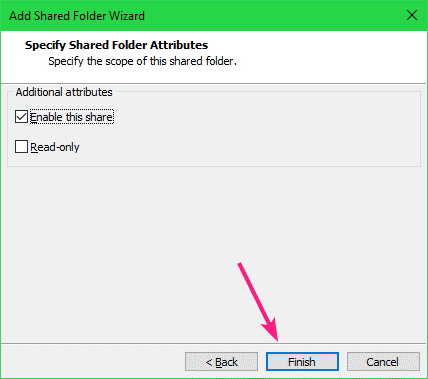
Make sure Enable this share checkbox is checked.
If you want this share to be read only, check the Read-only checkbox.
Once you’re done, click on Finish.
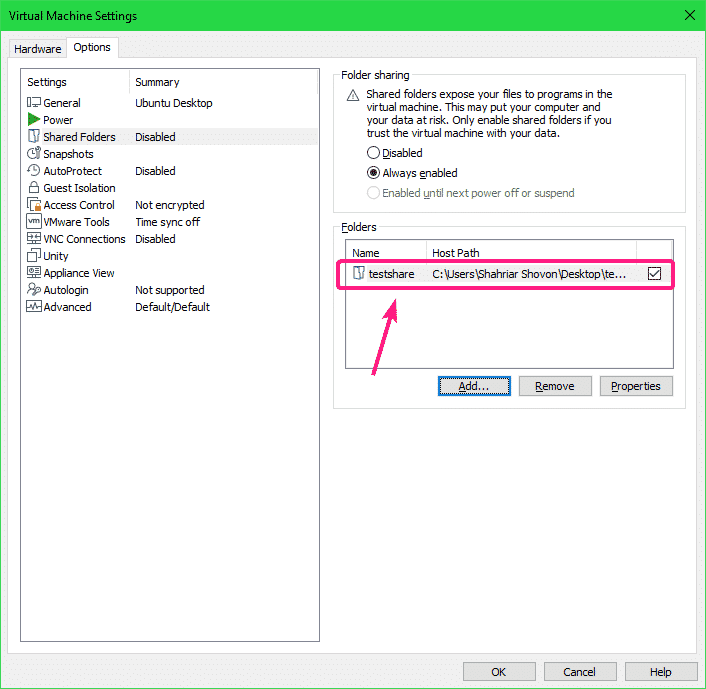
The share should be added to the VM.
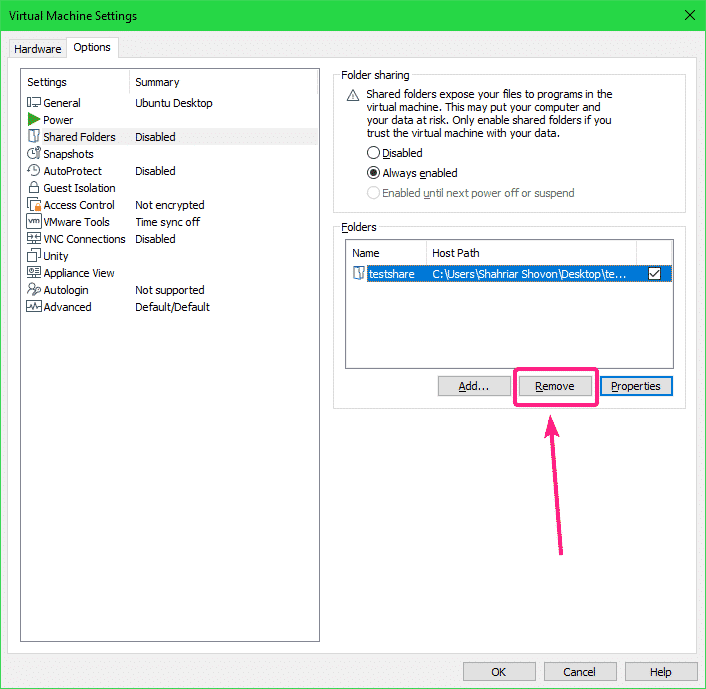
If you want to remove a share, select it and click on Remove.
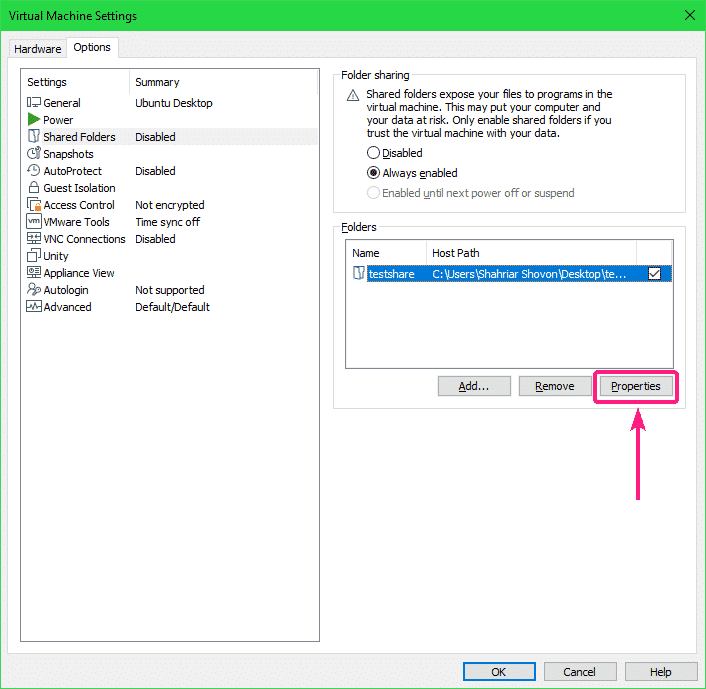
If you want to change any property of the share, select the share and click on Properties.
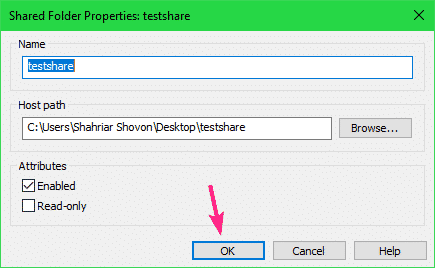
You can modify the Name, the Host path, share attributes from here. Once you’re done, click on OK for the changes to take effect.
Now, click on OK.
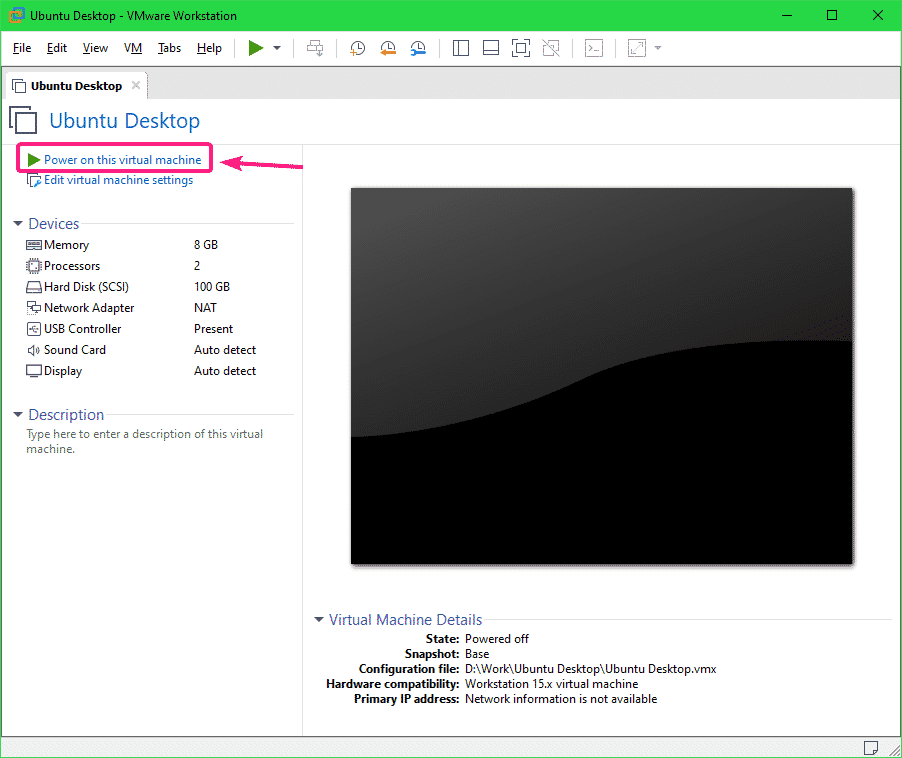
Now, power on the virtual machine.
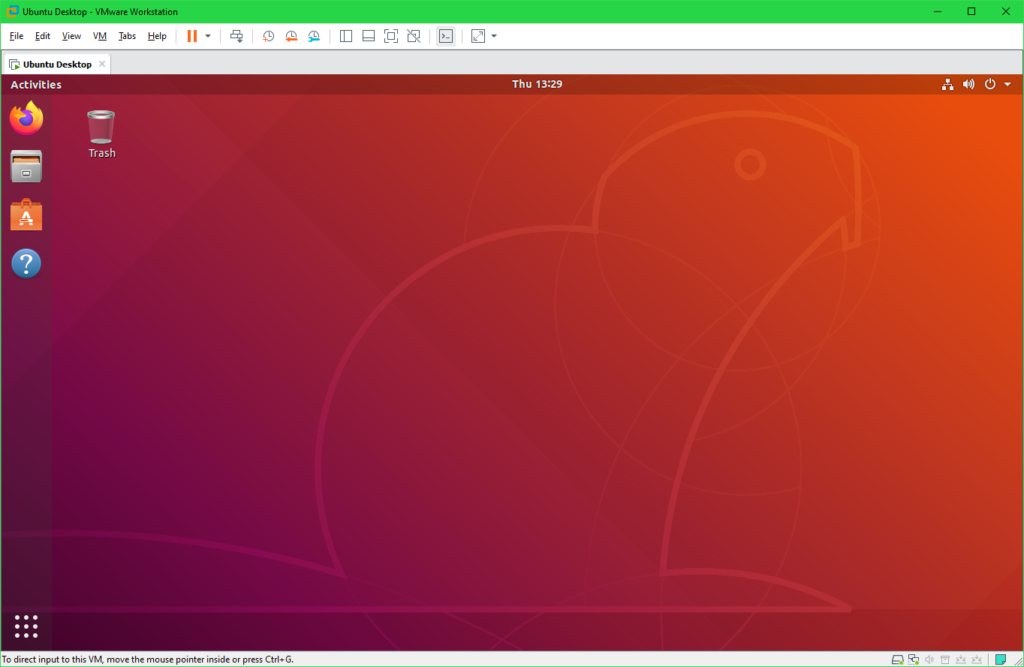
The virtual machine should start.
Installing Open VM Tools:
In order to mount VMware shares on Linux, you must have Open VM Tools or VMware Tools installed on your Linux VM.
If you’re using a Ubuntu/Debian or any Ubuntu/Debian based operating system in the VMware VM, then check How to Install VMware Tools on Ubuntu/Debian VMware Virtual Machine.
If you’re using CentOS/RHEL 8, then check How to Install VMware Tools on CentOS/RHEL 8 VMware Virtual Machines.
Mounting VMware Shares on Linux VM:
First, make a directory (let’s say ~/testshare) on the Linux VM where you want to mount the VMware share with the following command:
The command to mount a VMware share on a Linux VM is:
To mount the VMware share testshare on the ~/testshare directory, run the following command:
The VMware share testshare should be mounted on the ~/testshare directory.
By default, the VMware shares mounted on the Linux VM is only accessible to the root user as you can see in the screenshot below. I will show you how to solve this problem. So, don’t worry.
You can unmount the VMware share mounted in the ~/testshare directory with the following command:
To allow any user on the Linux VM to access the mounted VMware share, use the allow_other mount option while mounting the VMware share.
Now, you should be able to access the mounted VMware share without sudo or superuser privileges.
But, the files and directories on the share are still owned by root.
If you want the VMware share files to be accessible to your login user and also be owned by your login user, then mount the VMware share with the uid and gid mount options as follows:
.host:/testshare ~/testshare
As you can see, the VMware share files and directories are now accessible to my login user and also owned by my login user.
Automatically Mount VMware Shares:
If you want the VMware Linux VM to automatically mount the VMware share on boot, then you have to add a new line to the /etc/fstab file.
First, open the /etc/fstab file with the following command:
You may want to use vi text editor for editing the /etc/fstab file. In that case, run the following command:
Or,
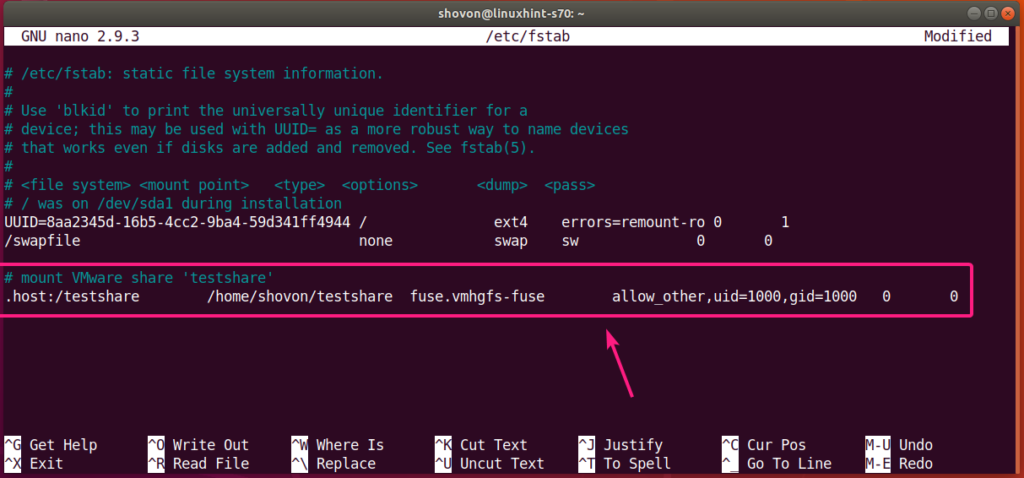
Now, add the following line at the end of the /etc/fstab file:
allow_other,uid=<YourUserID>,gid=<YourGroupID> 0 0
Note: Make sure to replace <VMwareShareName>, <MountDirectoryOnVM>, <YourUserID> and <YourGroupID>.
You can find <YourUserID> with the id -u command and <YourGroupID> with the id -g command.
In my case, I added to the following line to the /etc/fstab file:
allow_other,uid=1000,gid=1000 0 0
Once you’re done, save the /etc/fstab file.
Now, reboot your Linux VM with the following command:
Once your Linux VM starts, run the following command to verify whether the VMware share is mounted on the Linux VM:
As you can see, the VMware share testshare is mounted correctly in the ~/testshare directory.
I can access the VMware share as usual.
So, that’s how you share a directory/folder from the host to your Linux VMware VM and mount it from the command line on your Linux VM. Thanks for reading this article.

